Showing posts with label Easy. Show all posts

Wednesday, January 25, 2012

Whooooopie...Under 200 Calorie Breakfast Sandwiches

What can I say, I'm a joiner - if there is a bandwagon to hop on - COUNT...ME...IN!  Riding the bandwagon recently has meant two things: I am the proud owner of whoopie pie pan AND its time for a January diet.  I will admit that I haven't made whoopie pies in it, but it was awfully handy to make uniform sized egg patties for breakfast sandwiches. 


If I don't plan ahead, my morning will end with a pastry or 4 in my mouth, so I make these sandwiches in bulk, wrap them in saran, put them in a freezer bag and then microwave them all week when I am ready for breakfast. 

If you're a fan of the Sausage McMuffin - this is for you!  I have made it over
to only be 187 calories! 

What you'll need for 6 Muffins:
  • Light English Muffins
  • Fat Free Sharp Cheddar Slices
  • Turkey Sausage Patties
  • 12 Tablespoons of Egg Beaters (2T per whoopie pie pan cavity)


Place 2T of Egg Beaters in each of 6 whoopie pie pan cavities.  If you don't have a whoopie pie pan, use a jumbo muffin tin or 6 ramekins and bake at 350 for 15 minutes. 

After your eggs are complete, its time to assemble the sandwiches.  Open each English Muffin and place a slice of cheese on the bottom half of the muffin, place the sausage patty on top of the cheese and then the egg on top of the sausage.  Put the top half of the muffin on top and wrap in saran and freeze. 

To reheat, remove saran and wrap in a paper towel.  Microwave for 45 seconds on 50%, then flip the sandwich over and microwave 45 more seconds on 50%. 

Hope you enjoy your easy breakfast!

-Meg

Thirty on Thursday: Tissue Paper Plate

Have you ever found something you know you love but you have no idea what you're going to do with it?  Well I saw this tissue paper and while I had no idea what I was going to do with it, I had to have it.  Fast forward a couple of days, I needed some Valentine appetizer plates. (Ok, maybe need is a strong word - but c'mon who doesn't need cute plates?!?)  Well if you want a cheap, easy, and fast way to make some custom plates - you've come to the right place.

What you'll need:
  • Clear glass plate - the one I chose is $1.99 at Bed Bath & Beyond
  • Tissue paper of your choosing (fabric works well too)
  • Matte Mod Podge
  • Foam brush
  • Plastic plate or vinyl tablecloth to protect your work surface
  • Scissors

Place your plate upside down on your protective surface - I used a paper plate, but use whatever you have handy, and put the tissue paper over it, smoothing it out and then running your hand along the edge to score the paper where you should cut.

Cut out your tissue paper just inside the ridge from where you scored the paper with your hand so that it is a little smaller than your plate - that way there is no paper hanging over the edges. 

Take the foam brush and dip it into your Mod Podge and paint a thin layer on the back of the plate, place the tissue paper print side down so that when you flip it back over you can see the print through the top of the glass plate.

Smooth out the wrinkles starting in the middle and smoothing out to the corners.  Paint another thin layer of Mod Podge over the back side of the paper to seal it and let it sit to dry.


let dry for 20 minutes and you'll have this!


Seriously easy and super fast!!  Take thirty minutes this Thursday and make yourself a fun (and cheap) plate!  You NEED it!
-Meg

Tuesday, January 17, 2012

Chicken + Peanut Butter = Delish!

Update - If you liked this yummy curry soup, come join SoupaPalooza at TidyMom and Dine and Dish sponsored by KitchenAid, Red Star Yeast and Le Creuset for a whole stockpot full of great recipes!!

I have been craving the spicy food lately, even with the really warm winter we have been having, there is nothing better than a warm bowl of spicy soup on a winter day!  I went looking for a curry recipe that used the ingredients that I had in the cupboard already and I found this super easy one on delish.com.

Easy Peanut Butter Curry


Every time I read peanut butter and chicken together, in the same soup, I'm a little weirded out.  I mean you wouldn't have a chicken and peanut butter sandwich, right?  But this Peanut Butter Curry was super easy and fantastic!  For the original recipe, visit the link above, here is my adapted version that is a little spicier and includes more vegetables


  • 3/4 C smooth peanut butter


  • 2 C low-sodium chicken broth


  • 3 T madras curry paste


  • 1 can (13 2/3-ounce) unsweetened light coconut milk


  • 1 can (14 1/2-ounce) fire-roasted diced tomatoes (I used Muir Glen)


  • 2 boneless skinless chicken breasts


  • 1 pkg (8 ounce) sliced mushrooms


  • 1/2 C shredded carrots


  • Coat a pan with non stick spray and cook the chicken breasts, set chicken breasts aside and shred the chicken using two forks.  Using the same pan saute the mushrooms and carrots over medium heat until the carrots are soft. 

    In a large saucepan, whisk broth and curry paste. Heat over medium heat to boiling.  Whisk in coconut milk and peanut butter, and simmer for 2 to 3 minutes.  Stir in tomatoes, chicken, mushrooms, carrots and cook until heated through. Sprinkle with peanuts and serve with lime wedges, if desired.

    -Meg

    Sunday, January 15, 2012

    Red, White, and Green Lasagna

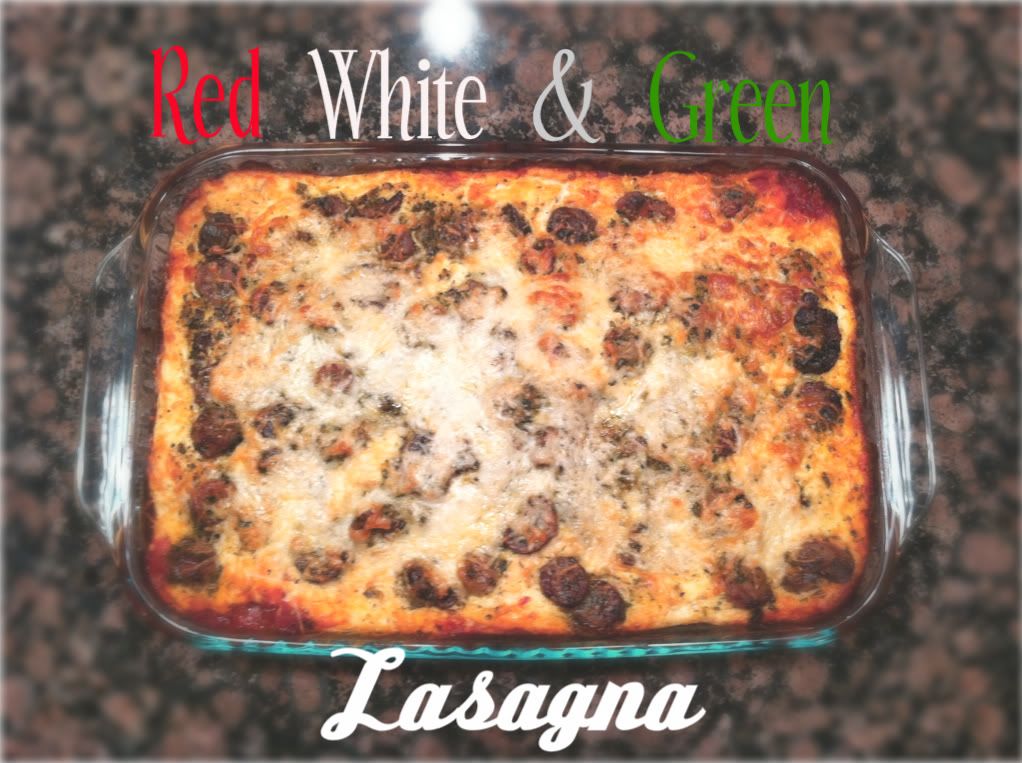
    Sunday night is the night I go through the fridge making sure to throw away any expired salad dressings, make sure I'm not growing any science projects in the produce drawer, and check any meat that I hadn't had a chance to cook yet and see if I need to throw it in the freezer (I HATE wasting groceries when there are still hungry people - when they solve world hunger I will begin to waste with abandon...but until then) and as I was going through my weekly inventory, I had some marinara and pesto that I needed to use up, and some turkey sausage that was only a few days from expiring, so this multi-colored lasagna was born.


    Red, White, and Green Lasagna

    For the red layer:
    1 - 15 oz Marinara (I used Buitoni - but any marinara would do)
    8 - Oven Ready Lasagna Noodles

    For the white layer:
    2 - 15 oz Tubs of Fat Free Ricotta Cheese
    1/2 C Egg Beaters (or you can use 2 large eggs)
    2t Italian Seasoning
    1/2 C Shredded Parmesan Cheese
    1 3/4 C Shredded Italian 3 Cheese 2% Milk Blend (You could also use regular Italian Blend)

    For the green layer:
    1 - 7oz Reduced Fat Pesto (I used Buitoni - but any pesto would do)
    1 - 10oz Pkg Archer Farms Spinach Garlic Turkey Sausage, Sliced
    1 - 8oz Pkg Sliced Mushrooms
    Dash of salt
    non-stick cooking spray

    Topping:
    1/4 C Shredded Parmesan Cheese
    1 C Shredded Italian 3 Cheese 2% Milk Blend

    Preheat the oven to 375 degrees

    First assemble the green layer by spraying a skillet with non-stick spray and sprinkle with a dash of salt, putting the skillet on medium heat, add the mushrooms and cook for 5 minutes and then add the sliced sausage and cook until the mushrooms and sausage slices are browned.  Once browned, remove from heat and stir in the pesto, and set aside.

    Next assemble the white layer by mixing together the cheeses, egg, and italian seasoning in a medium bowl and set aside.

    Now you're ready to put the lasagna together, in a 9x13 baking dish put half of the marinara on the bottom of the pan, then place 4 of the lasagna noodles on top.  Then spread half of the white layer mixture on top of the noodles, followed by half of the green layer then 4 lasagna noodles.  Then to finish it off spread out the remaining half of the marinara on top of the noodles, then the remaining half of the white layer mixture and the last half of the green layer mixture layered on top. 

    Bake in a 375 degree oven for 60 minutes, sprinkle the topping cheeses on top and put back into the oven for 10 minutes.

    Reasons I like this lasagna:
    • Its easy to use light ingredients and you can't taste the difference
    • The only cooking involved was to brown the sausage and mushrooms
    • This lasagna has 8-10 servings, which means that I will cook once and have multiple meals already made
    • Lasagnas freeze beautifully - you can assemble it and freeze before or after baking
    • It was easy enough that I was able to watch the Golden Globes pre-show red carpet while assembling it
    I hope everyone had a great weekend!

    -Meg

    Thursday, January 12, 2012

    So You Think You Can Cook?

    Tonight, I was driving home (stomach growling), thinking about what I was going to make for dinner. Usually, my quick and easy go-to dinner in the winter is a little angel hair pasta with butter and grated cheese. There's nothing like easy, cheesy pasta to make all the insanity of your day melt away!

    However, after chatting with Meg today, I decided to change it up a little. We were talking about how since the start of the blog, we find ourselves cooking more and wanting to try new things. To stop making the same things over and over because we're too afraid (or lazy?) to go outside of our comfort zone. So, I ran with that thought.

    To add a little pizazz to my "lazy-man's dinner", I heated a tablespoon of olive oil in a pan, added a teaspoon of garlic, a teaspoon of basil and a pinch of salt and pepper. Once the noodles were finished cooking and drained, I tossed it in the mixture. Added some grated cheese and... VOILA! It was so much tastier than my usual noodles and cheese. It was EGG-CELLENT!

    (Please note that I was also watching Celebrity Cook-Off Rachael Ray vs. Guy Fieri. I don't know if it was the spirit of the show or my lack of 'experience' but I may as well have been a contestant. I'm jumping around the kitchen trying to make sure the garlic doesn't burn or that the noodles don't set too long. After all was cooked and eaten, I looked back and saw stuff laying everywhere. It was just so pathetic. If a camera was in the kitchen, you would've seen a crazed-hungry, jumping bean making a total mess... Just sayin'.)

    Now, I know this is nothing special BUT, I tried something different. Moved outside my comfort zone... on a week night at that! This is not the kind of thing I usually do. So, Bravo, Tina! Bravo!

    Until next time...

    ~Tina, the other egg

    Tuesday, January 10, 2012

    Every Lazy Lady's Dream - Candy Bar Cookies

    Happy New Year!!  For those of you that have resolutions that include losing weight or eating less sugar, you'll want to go get back on the treadmill and just ignore this. 

    Ok, now that I have just "my people" here, Crisco's chosen ones, lets talk cookies - sometimes a girl just needs a plate full of cookies that look impressive and taste fantastic, but you don't have the time or energy to start on a recipe that begins with "Sift the first 12 dry ingredients together" then this is the cookie for you.  This isn't a recipe, this is simple assembly. 

    Candy Bar Cookies

    What You'll Need
    Premade Sugar Cookie Dough
    Snickers Mini Size Candy Bars

    Using your cookie scoop, scoop out the desired number of cookies so that you have uniform amounts of cookie dough. 

    Flatten the scoops into little round circles.

    Put a snickers mini in the middle of the dough, and seal the candy bar inside.

    Place on a cookie sheet and bake as directed, taking the cookies out a minute before suggested so they don't burn on the bottoms as you let them cool while they are on the pan instead of a rack because they are pretty delicate and fall apart when moved since their middles are all melted chocolate and nougat.


    If you are feeling particularly motivated you can decorate the tops of the cookies (Nothing says lazy lady like posting a pic of the Christmas tree cookies in January, now does it?!?)  To decorate the tops, I put a few green Wilton candy melts and a few red Wilton candy melts into freezer bags, put them in the microwave for 30 second intervals, stopping between to knead the melting candy until it was the right consistency to squirt out of a snipped off freezer bag corner and just freehanded the trees.  I think they would also be cute with white snowflakes on top for winter, red hearts piped on for Valentines, shamrocks for St Patrick's Day and so on.  (Where did I get the idea to pipe on decorations using a freezer bag with the corner snipped off?  Well Tina of course, she's brilliant if you haven't noticed!) 


    So, don't stop here with just the sugar cookie and snickers bars, come up with your own combos, such as peanut butter cookie dough with Reese's minis inside - there is no end to the flavor combinations and these cookies are so easy you will find yourself making them over and over and the best part, people ALWAYS compliment how yummy these cookies are!  Enjoy!

    -Meg


    Site Design by Designer Blogs